
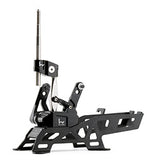

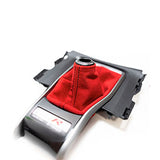
Hybrid Racing Adjustable Short Shifter for 16-21 Civic

  • Smooth, precise and direct shifts!

  • Compact 4-Link Wishbone

  • Anodized Billet Aluminum & One-Piece Steel Frame

  • Height Adjustable Shift Knob

$367.99 $459.99 $459.99

/
Subscription

Select an option to add this to your cart

Availability needs to be checked. See the message below.
Delivery truck icon Ships in 3-6 Weeks
In stock · available
Available to order

Color: Dust Red

Part # HYB-SAS-01-36

Vehicle compatibility

Check compatibility with your vehicle.

Description

Hybrid Racing Adjustable Short Shifter - 2016-2021 Civic Si, Sport & Type R (FK8)

This is the Hybrid Racing adjustable short throw shifter for the 2016-2021 Honda Civic, covering the Civic Si (FC1/FC3), Sport MT (FC2/FC4/FK7), and Civic Type R (FK8). The 10th gen came with one of the better factory shifters out there, which makes improving on it a real challenge. When we set out to design ours, we zeroed in on the specific places the factory unit falls short. After more than 15,000 street and track miles and a full year of testing in our own Civic Type R, this is what we landed on: a stronger, better-feeling short shifter that's fully adjustable to how you drive.

One-Piece Welded Frame

Reliability comes from keeping things simple. Any experienced racer knows that fewer parts means fewer chances for something to fail. Our frame is one-piece and robotically welded steel, so it's strong and there are no frame bolts to work loose over time. It's built to take years of hard use without fatiguing.

4-Link Wishbone Rocker Design

The shifter uses a 4-link wishbone rocker design that gives you extremely short, precise movements while keeping the shifter cables at their optimum angle. That last part matters: some shifters on the market need cable reinforcement brackets and tie-downs to work right, which is a fix for a problem that shouldn't exist in the first place. Get the cable angle right and you don't need the band-aids.

We also run a single internal spring instead of torsion springs. Torsion springs can give you inconsistent resistance from shift to shift, while the internal spring stays constant through every gear change and gives you smooth, consistent centering.

Build Quality and Warranty

The frame is laser-cut and robotically welded steel, built to hold up without fatigue. The billet aluminum parts go through our three-step finishing process so they come out consistent and clean. The whole shifter is backed by our Racer's Guarantee 2-Year Warranty.

Adjustable Throw by Model

The shifter adjusts to a different throw-reduction range depending on your car, so you can dial in how short you want it:

  • Civic Sport MT (FC2 / FC4 / FK7): 10%-50% reduction
  • Civic Si (FC1 / FC3): 10%-30% reduction
  • Civic Type R (FK8): 10%-20% reduction

Fitment

  • 2016-2021 Honda Civic Sport MT (FC2 / FC4 / FK7)
  • 2016-2021 Honda Civic Si (FC1 / FC3)
  • 2017-2021 Honda Civic Type R (FK8)
FITMENT
2016-2021 Honda Civic
INSTALL GUIDE

Install guide

Hybrid Racing 16-21 Civic Short Shifter Install Guide

Black and red Hybrid Racing short shifters with black brackets standing upright on white background.
Cover photo showing the Hybrid Racing short shifter kits in black and red for the 2016-2021 Civic install guide.
Difficulty
Moderate
Steps
23
Time required
1 hr
Category
Drivetrain

Tools

  • 5mm Allen wrench
    Quantity: 1
  • 10mm socket
    Quantity: 1
  • #2 Phillips head screwdriver
    Quantity: 1
  • 14mm Open End Wrench
    Quantity: 1
  • 1/4" or 3/8" Ratchet
    Quantity: 1
  • Plastic Panel Removal Tools
    Quantity: 1
  • 6"-10" Ratchet Extension
    Quantity: 1
  • Medium Size Channellock Pliers
    Quantity: 1

01 Shift Knob Removal

Hand grasping the silver spherical shift knob above the black leather boot in the Civic Type R center console.
Hand removing the factory shift knob by lifting it from the top of the shifter boot.
Chrome boot collar around the exposed threaded shaft on the Civic center console shift boot.
Red arrows point to the boot collar clips to push downward for removal after the shift knob is off.
Threaded shift lever shaft exposed in the center console after shift knob and boot collar removal.
After removing the knob and collar, the bare threaded shifter shaft remains in the center console.
  1. Remove your shift knob.
  2. Remove the boot collar by pushing downward on the clip.
  3. Use a 14mm Open End Wrench to unscrew the threaded section of the collar. Some may require tools to remove, be careful not to damage the threads.

02 Console Removal

Hands pull upward on the black side console pads flanking the center console between red front seats.
Pull upwards on the side console pads so they pop free from the center console.
Hands lift a side console pad upward from the center console between the front seats.
Pull the side console pads straight up so they pop free from the center console.
Center console between front seats with side pads removed, exposing black plastic frame and cup holders.
Side console pads pulled up and removed from the center console, revealing the underlying plastic structure.
  1. Pull upwards on the side console pads and remove them.
  2. They aren't screwed or bolted into place so just pull up and they will pop out.

03 Console Removal

Red plastic pry tool under the edge of the upper center console section beside the shifter boot.
Use a plastic panel tool to pry up the upper console section held by clips near the shifter.
Hands pull the upper console section free from clips beside the center console shifter in a Civic.
Once pried free, grab the upper console section and pull it toward you to release the remaining clips.
Honda Civic Type R center console with upper trim panels removed around climate controls and shifter.
Both left and right upper console sections are popped off, exposing the area around the shifter and climate panel.
  1. Use a plastic panel tool to pry the upper console section. Once it pops up, grab the upper section and pull it towards you.
  2. These panels are held in with clips and do not require tools.
  3. Pop both left and right upper sections off.

04 Remove the Console Cover

Phillips screwdriver loosening a screw on the shift boot cover in the Civic center console.
Unscrew one of the two screws holding the shift boot cover with a #2 Phillips screwdriver.
Phillips screwdriver removing a screw on the center console side next to the brake hold button.
Unscrew this screw holding the shift boot cover beside the brake hold and parking brake switches.
Hands pry both sides of the shift boot console cover upward in the Civic Type R center console.
Pry the sides of the console cover up with your hands to pop it free, watching for electrical connectors.
  1. Using a #2 phillips screwdriver, unscrew the two screws that hold the shift boot cover.
  2. Use your hands and pry the sides of the cover up and pop it off.
  3. cautionDon't pull on it too hard because there are electrical connectors holding it in place.

05 Unplug Drive Mode Harness

Hands unplug a small harness connector on the drive mode selector assembly in the center console.
Unplug the drive mode selector harness at the connector indicated by the arrow.
Black multi-pin and white connectors unplugged from the drive mode and parking brake buttons on the center console.
Unplug the drive mode selector harness and the parking brake/brake hold button connectors shown by the arrows.
  1. Unplug the drive mode selector as well as the parking brake and brake hold button.
  2. noteDepending on the year/model you may have more or less buttons to unplug here.

06 Remove Climate Control

Hands positioned under the climate control panel lower edge in the Civic center dash.
Use your hands to pry the lower section of the climate control toward you until it begins to release.
Hands hold the climate control panel pulled forward from the Civic center dash below the screen.
After prying the lower section free, grab the climate control from both sides and pull it further out of the dash.
White and gray wiring connectors on the rear of the climate control unit with red arrows.
Unplug the two electrical connectors from the back of the climate control before setting it aside.
  1. Use your hands and pry the lower section of the climate control towards you.
  2. Once it pops out, grab it from the sides and pull a little more. It should pop out.
  3. Unplug the climate control and set it aside.

07 Remove the Upper Console

Two upper console screws below the infotainment screen on the Honda Civic center console.
Remove the two upper console screws shown by the red arrows on either side below the display.
Phillips screwdriver tip on a screw at the upper console beside the center stack and leather dash trim.
Use a #2 Phillips screwdriver to remove the upper console screw next to the center stack.
Phillips screwdriver tip on the center console screw in the open Civic shifter console area.
Remove the center console screw with a #2 Phillips screwdriver as shown in the circled area.
  1. Use a #2 Phillips screwdriver to remove the two upper console screws.
  2. Next, remove the center console screw.

08 Remove the Upper Console

Hands lift the black upper center console housing clear of the manual shifter in a Civic Type R.
Pop the sides of the upper console free with your hands, then lift it upward to remove it completely from around the shifter.
Hands hold the freed upper console trim above the Civic center stack while a tool works the lower edge.
After popping the sides free, lift the upper console straight up to clear the shifter and remove it completely.
Center console area with upper console removed, exposing the manual shifter and hanging wiring in a Civic Type-R.
Upper console lifted free and removed, showing the exposed shifter and wiring after popping the sides up.
  1. Use your hands and pop the sides of the console up. Once it is free, lift upwards and remove it completely.
  2. noteYou may need to put your shifter into 4th gear to clear the plastic cover.

09 Remove Front Console Cover

Lower front console cover area with open 12V socket and USB port, hand using red pry tool at bottom edge.
Use a plastic pry tool on the lower section of the console cover, then unplug the 12V and smartphone USB connectors.
Hands hold the removed front console cover showing its USB port and 12V socket below the dash.
With the front console cover free, unplug the smartphone USB connector and the 12V power socket.
Hand holding console cover with 12v and USB connectors unplugged under the front console.
Unplug the 12v connector and the smartphone USB connector from the front console cover.
  1. Use a plastic panel pry tool on the lower section of the console cover.
  2. Unplug the 12v connector and the smartphone USB connector.

10 Remove the Rear Console Section

Black rear center console section between front seats, hand holding the left side near the red seatbelt.
Locate the rear console section between the seats; separate it with a plastic pry tool as shown.
Rear center console section open on Civic, exposing harness and base above red-trimmed floor mats.
After prying off the rear console cover, locate the keyless entry connector and harness clip to unplug and free.
Keyless entry connector and harness clip on the underside of the rear console section.
Unplug the keyless entry connector and remove the clip holding the harness in place.
  1. Use a plastic panel pry tool to separate the rear section of the console.
  2. Once the cover comes off, unplug the keyless entry connector and remove the clip holding the harness in place.

11 Unbolt Center console

Open center console bin with cup holders between front seats of the Civic.
Look inside the center console storage area where the two screws will be removed.
Two screws on the floor panel inside the open center console between the front seats.
Remove the two screws inside the center console, shown at the base with red arrows.
Hand uses a screwdriver on the left screw inside the center console bin.
Remove the left of the two screws inside the center console bin.
  1. Remove the two screws inside of the center console.

12 Disconnect Console Wiring Harness

Lower USB connector flipped open beside the cup holder in the Civic center console.
Arrow points to the lower USB connector to remove from the center console.
Console wiring harness connector under the lifted center console between the front seats.
Red arrow shows the console wiring harness connector to unplug after lifting the console.
White console light connector and black USB wire clip under the lifted center console.
Arrows mark the console light connector and lower USB wire clip to unplug from the bottom of the console.
  1. Remove the console light as well as the lower USB connector.
  2. You will need to lift the console up and unplug it from the bottom.

13 Remove the Center Console

Center console slid back from the Civic dashboard, unclipped at both lower sides near the carpet.
Arrows show the center console sides unclipped after sliding it backwards a few inches from the dashboard.
Center console removed, exposing the shifter assembly and wiring between the front seats.
With the center console fully removed, the shifter mechanism and surrounding components are visible between the seats.
  1. Slide the entire console backwards a few inches to unclip it from the dashboard.
  2. Lift the rear section up and remove the entire console from the car.

14 Remove the OEM Shifter

Screwdriver on left bolt securing the console bracket to the chassis floor near the shifter.
Remove the two circled bolts that hold the console bracket to the chassis.
Chrome socket on a 10mm bolt at the base of the OEM shifter assembly on the Civic chassis.
Socket tool engaged on one of the four 10mm bolts securing the factory shifter base during removal.
Black factory shifter base with visible mounting bolts on the Civic chassis floor beside a fabric-sleeved cable.
View the base of the factory shifter and its mounting bolts on the chassis floor for removal.
  1. Remove the two bolts that hold the console bracket to the chassis.
  2. Remove the x4 10mm bolts on the base of the factory shifter.

15 Remove Wiring Harness

Wiring harness secured by a clip on the side of the factory shifter housing.
Red arrow shows the clip holding the wiring harness to the factory shifter for removal.
Black corrugated wiring harness clipped to the factory shifter bracket near the pedals.
Arrow shows the wiring harness clip to remove from the factory shifter.
  1. Remove the clips that hold the wiring harness to the factory shifter.

16 Disconnect Shifter Cables

Lower shifter cable end link and retaining ring on the factory shifter ball under the Civic dash.
Pull the lower cable retaining ring apart, then slide the cable end link off the shifter ball as the arrow shows.
Lower shifter cable end link with retaining ring seated on the factory shifter ball pin.
Pull apart the lower cable retaining ring, then slide the cable end link off the shifter ball.
  1. cautionRemove the cables from the factory shifter. This can be tricky so take one cable at a time. It spins and then slides upwards out of the shifter.
  2. Pull the LH side retaining ring and slide the cable off the pin.
  3. The lower cable retaining ring must be pulled apart and then you can slide the cable end link off the shifter ball.

17 Install the Hybrid Racing Shifter

Gold Hybrid Racing short shifter bolted to the black chassis bracket on the Civic floor, cables lined up.
Hybrid Racing shifter installed on the chassis bracket with shifter cables aligned at the cable mount.
Hand twists the black cable mount and slides it into the Hybrid Racing short shifter above the Civic floor.
Twist the cable mount and slide it into the shifter, aligning it so the cables will slide in correctly.
Hand holds black cable mount with grey tip at the Hybrid Racing short shifter on the Civic floor.
Twist the cable mount and slide it into the shifter, aligning it so the cables seat correctly.
  1. Install the Hybrid Racing shifter and line up the shifter cables.
  2. Twist the cable mount and slide it into the shifter. Make sure you align it correctly otherwise the cables will not slide in.
  3. Using the provided bolts and washers bolt the shifter to the chassis with a 5mm Allen wrench
  4. noteOnce the cables are installed on the shifter, you will need to slide the stock cables through the floor grommet. It may take a bit of force but they slide through easy and you can bolt the shifter into place.

18 Throw Adjustment

Gold Hybrid Racing short shifter lever with red arrows at upper cable holes and blue arrows at lower holes.
Red arrows show Position 1 and blue arrows show Position 2 holes for independent front/back and left/right shifter cable throw adjustment.
White stock shifter cable end link attached to the gold Hybrid Racing short shifter arm.
Blue arrow highlights the stock end link connecting the shifter cable to the short shifter during throw adjustment.
Black gloved hand points to the gold circular throw adjustment on the Hybrid Racing short shifter base.
Choose Position 1 or 2 on the throw adjustment and connect the shifter cables to the short shifter.
  1. There are two separate adjustments for each shifter cable. The Front/Back and Left/Right cable can be adjusted independently.
  2. Position 1 is the longer of the two settings. In an FK8, this setting is about 5% shorter than stock.
  3. Position 2 is the shortest possible setting. In an FK8 this setting is about 25% shorter than stock.
  4. Choose your preferred settings and connect the shifter cables.
  5. notePlease note that the included pin and washers are only to be used with aftermarket shifter cables. IF you are using the stock cables, you will not need them. Use the stock end link and stock clip.

19 Attach the Wiring Harness

Factory wiring harness secured along the base of the Hybrid Racing short shifter.
Blue arrow shows the factory wiring harness reinstalled onto the base of the Hybrid Racing shifter.
Black zip tie securing the factory wiring harness sleeve to the Hybrid Racing short shifter base.
Look at the zip tie fastening the reinstalled factory wiring harness onto the base of the Hybrid Racing shifter.
Factory wiring harness and corrugated tube secured at the Hybrid Racing shifter base above the carpet.
Blue arrow shows the factory wiring harness reinstalled onto the base of the Hybrid Racing shifter.
  1. Reinstall the factory wiring harness onto the base of the Hybrid Racing shifter.

20 *OPTIONAL* Swapping the Shifter Spring

Gold Hybrid Racing short shifter secured by Allen bolts to its base in the Civic.
Arrows mark the Allen bolts holding the shifter to the base; remove all four as shown.
Gold Hybrid Racing short shifter above the base, blue arrow marking the circular lower spring seat.
After lifting the shifter off the base, note the lower spring seat where the spring sits for the optional swap.
Softer and stiffer shifter springs side by side on a textured surface for the Civic short shifter.
Compare the two shifter springs; swap to the softer spring if you want a less stiff shift feel.
  1. Remove the 4 Allen bolts that hold the shifter to the base. (only 3 are shown in the image)
  2. Once the four bolts have been removed, lift the shifter assembly up and the lower spring will come out of the bottom.
  3. Each Hybrid Racing shifter comes assembled with the stiffer spring, if you prefer a slightly less stiff feeling, swap the spring to the softer spring.

21 Torque Shifter Bolts

Socket and extension on a mounting bolt of the gold Hybrid Racing short shifter in the Civic center console.
Look at the socket wrench engaged on the short shifter bolt being torqued in the center console.
  1. reminderIf you chose to change the inner spring, use a torque wrench and tighten the bolts to 6ftlb / 72inlb.

22 Reinstall Console

Gold short shifter assembly with silver shift rod and blue V-lines marking the upper offset inside the center console.
Blue lines highlight the upper offset on the short shifter; loosen its bolt slightly to rotate the shift knob left or right as needed.
Gold short shifter with orange knob installed in the open Civic Type R center console.
Reinstalled center console around the short shifter; upper offset adjusted so the shift knob faces correctly.
  1. Follow the interior removal steps in reverse to install the entire center console.
  2. Adjust the upper offset to rotate the shift knob.
  3. Due to space limitations, the offset can only be rotated a slight amount to the left or right. Our shifters are assembled in a LHD configuration. If you are installing this in a RHD car, loosen the offset bolt to rotate the shift knob towards the driver.

23 Adjust the Shift Knob Height

Gold short shifter in Civic center console with blue arrow pointing to side height-adjustment set screw.
Blue arrow shows the set screw on the short shifter body used to set shift knob height.
Gold shift knob raised high on the short shifter shaft in the Civic center console.
Shift knob at maximum height on the short shifter with boot and collar removed.
Gold Hybrid Racing shift knob high on the short shifter shaft in the Civic center console.
Shift knob at maximum height on the short shifter with boot and collar removed for this step.
  1. Use a 5mm allen wrench to adjust the shift knob height and set it to your personal preference.
  2. These images depict the minimum and maximum height.
  3. noteWe removed the shift boot and collar for these images. It will 100% work with the stock knob, stock boot and collar.

Finishing up

Reinstall the center console by following the interior removal steps in reverse. Adjust the upper offset to rotate the shift knob as needed, and use a 5mm Allen wrench to set the shift knob height to preference. If the inner spring was changed, tighten the bolts to 6ftlb / 72inlb.

Revision 3 ยท Updated Nov 13, 2026

YOU MAY ALSO LIKE

RECENTLY VIEWED